The Big Sensor + RAW Difference
3k or 4k or 6k or 8k, RAW, 16Bit or 12Bit or 8Bit, LogC or SLog3.Cine or REDCine or Rec709, SSD, MultiChannel, Discrete. These words are at the heart of everything that we do in Digital Cinematography, even if they sound like gobbledygook – so what does it all mean?
CLAi are built on one simple truth – Quality Shines. It doesn’t matter what you do in a visual and aural medium, if it is of the highest quality then it will make the actual content stand out 95% of the time. If you couldn’t make out Dr King’s words then you wouldn’t have a dream – if you couldn’t see Armstrong’s feet as he touched down on the moon then it isn’t one small step.
It’s one of the most obvious statements I can make, but one that is forgotten time and time again by production companies and their clients. Unless there is a good reason not to, then at a minimum you should be able to see and hear what is put before you, and it should be the right color and sound like reality. (strangely enough most of my work as a colorist and sound sweetener is still about correcting these flaws)
When you have a result that looks and sounds great, then you can start to add nuances with the textures of light, the colors of objects, the way things move and the nature of the sound to create a look or a mood to control how an audience react to a piece in a designed manner. But to do that you need to have the highest quality origination that you can to allow you the greatest flexibility to change it.
We are still very much in a world where 29.97 frames per second 1920×1080 HD 8Bit television rules the day. However, for internet based video – from YouTube to Netflix, as well as live presentation video, film theater projection and all manner of corporate videos and other media – this either has changed or is in the process of changing. Here the new standard is Ultra High Definition, or UHD 4k, a 16:9 aspect ratio video at a size of 3840×2160 pixels (around four times the size and resolution of HD), in Rec 2020 color space (covering 75.8% of the possible color range rather than the “old” Rec 709 color space standard of HD video, that only covered 35.9% of that space), this is in 12Bit color depth (Rec709 was a much lower 8Bit color – 16.7 million versus 68.7 billion colors.
Simplifying this into “what you see” terms the images are much sharper, they have less banding or streaking, are brighter and much more colorful – and much more accurate to life – than the old HD standards. The bit depth means seeing color banding versus seeing smooth color gradations.
Many video and film productions choose to ignore this new standard, as HD video still looks very good when lit and shot with a good camera by a good DP. But put the two side by side and the difference is immediate and apparent. The questions then become “can you afford to be seen as lower quality in your media?”, “does it matter if what you produce today is out of date tomorrow?” and, of course “how do you achieve this standard or better?”.
If you can you always want to have an image that is bigger than the destination size, and so this would be true 4k, at 4096×2160 pixels. But just shooting 4k doesn’t guarantee to give you the best result. The size of the sensor area used to get that result is critical, as is the color bit depth of the resulting image, and the degree of manipulation that image is capable of before it is written as a permanent file (like a quicktime movie). So a teeny 4k GoPro isn’t going to give the same result as a large RED Dragon sensor with both shooting at 4k.
The bigger the sensor and the bigger each individual pixel is the better the image, in most situations. Between the top players, Arri, RED and Sony this is handled in different ways. Arri squeeze the most out of their sensors by having large pixels that allow for a high color depth, very accurate and even color recording and extremely low noise without pushing the resolution of the image. In fact the Arri sensor is more or less 3k in size, but the image from it is so clean that it is upsized to 4k within the camera or the recorder. RED go for the highest resolution in 6k or 8k type numbers, but do so by having very small pixels with a lower color depth and more noise. Sony also go for higher quality rather than higher resolution, but their color chemistry isn’t as good as Arri or RED, so they do so at high ISO exposure ratings with very high noise.
We do have the option of shooting video in 8k with the RED Helium, and at 3,000 frames a second on a Phantom Miro – but these are excessive standards for most projects that put too much of a burden on other pieces of the equation.
To our mind the goal is to shoot at true 4k 4096×2160 pixel images (or the Arri upsized image) at 24 frames per second, and the highest color bit depth realistically possible at 16 Bit (256 times more colors than 8 Bit color depth), with the lowest possible noise. This combination gives a truly spectacular image palette to work with, and provides many possibilities for the editor and colorist to take the pictures in different directions.
Shooting in SLog3 or LogC allows the camera to have an increased latitude, giving 14 to 16 iris stops instead of the usual 9 or so of Rec709, and I can extend this even further by shooting High Dynamic Range, while SSD cards give me lots of capacity and lightning fast recording to handle all of this.

4k allows me lots of control after the shoot. If I zoom it down to 1080P HD then I get an amazingly sharp image
But if I want to I can choose to reframe the 1920×1080 image inside the 4096×2160 picture I have captured and make two or more shots out of the one, or create a sideways dolly shot, or build a zoom in or out – without any appreciable loss in quality. Obviously the higher the quality of the recording codec, Sony MXF or ProRes HQ or 4:4:4:4 for example, the better it can handle these moves.
You can add to this formula even more by shooting RAW images rather than regular encapsulated images – a RAW image is saved as data whereas a regular camera image is saved as pixels, where all of the possible variations that the camera can make before recording are burnt in and can’t be changed once the shot has been taken. So if I shoot a scene under green florescent lighting and don’t have the perfect color balance set in the camera then the subject will look very nasty.
But if I shoot it in RAW I can change the color balance after the shoot to what would have been the perfect setting, and give them back natural skin. This is just one simple example of all of the camera settings that can be changed after the shoot is complete to images that are recorded RAW.
So, we ideally want RAW for flexibility, 4k for image quality and coverage, 16 Bit color space, in LogC or Slog3.cine, onto SSDs with discrete multichannel recording. There are very few digital film quality cameras that can achieve this.
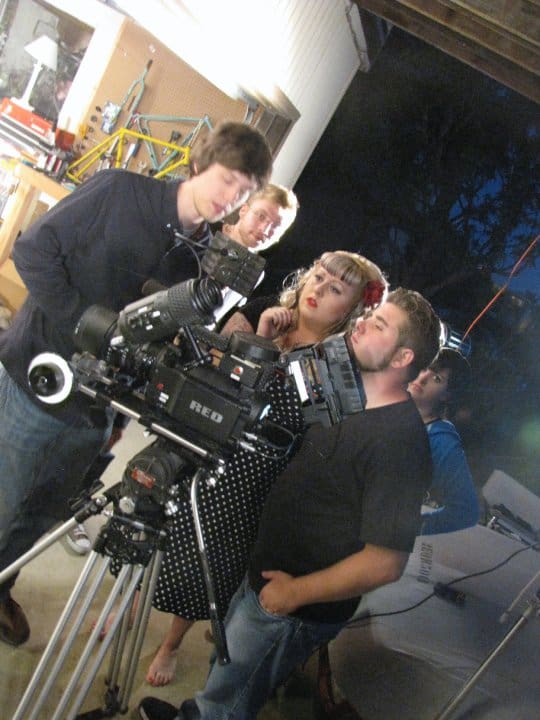
Currently in the Sony line the F5, F55 and Venice are the candidates, with recorder backs installed. RED cameras can achieve similar results but use a totally different wavelet technology for recording images and sound. Arri Alexa cameras work in a different way again, and can record ArriRaw internally or to n external recorder depending on the model. You can get close if you shoot RAW with a Sony FS7 or Sony A7Sii and an Odyssey external recorder in 12 Bit color space. Our in-house main cameras are Arri Alexa Pluses, Sony F5 and multiple Sony A7Sii, all recording RAW images in HD, 3k or 4k with 12 or 16 Bit colors as we have them configured.

After many years of shooting only with RED digital film cameras the switch to owning Sony and Arri Alexa units was a challenge
But all of the work we did designing editing and color grading systems that worked for the RED from scratch have come into play again with the Arris and Sonys as we have put together a “perfect” post workflow for these units to get great footage from shot to master.
Of course, we also still shoot on RED Dragons and Weapons often – as well as or instead of our Alexas and Sonys – depending on the nature of the project and the demands of our clients. And the camera is only part of the equation – lighting and audio are as critical to great asset collection, and we spend just as much time on these elements as we do on the camera stuff, as well as all of the camera support and motion elements, and the post systems.
On the audio front we like to record up to 8 audio tracks on the camera in sync, 2 of which are mixed, but also record 8 or more tracks onto a separate digital recorder at a higher resolution. letting the recordist keep each track of the recording discrete (and double record mics at two different levels in case of high or low levels). This allows the editor to position each clip of audio in the right space to match the action, as well as cleanly controlling the level mix independently.
In fact, the post production side of this equation is the easiest part to describe, really. If we get footage that is sharp, so at a high resolution, and controllable, so RAW, with good color information, so 12Bit color recording, then we can play around with it during the edit to our hearts content, and get it to jump through hoops in color grading and VFX if we use the right software and system. If we get footage that is in a weak codec, like Quicktime H264 or Sony MXF, that has the look burnt into the codec, and it is a lower resolution, like HD, with limited colors, like 8Bit or even 10Bit, then we are going to be restricted in what we can do in edit and grading – and if we have high noise in the blacks, like a Sony image that hasn’t been deliberately overexposed by a stop, then we may have unusable or uncorrectable images to do anything other than place them in a timeline and not touch them in any way.
Of course, last but not least – nothing ever goes out of CLAi without being color graded and audio sweetened on our DaVinci systems. However large or small the project, we always get the best that we can from the footage and that means color grading every shot. We also always shoot for the grade, like all good professional cinematographers and DPs.
So only after we have turned the raw assets into digital film does it go out for release – even if that means making LUTs to be applied by the editor when we are just brought in to shoot a project and there is no professional Colorist on the project.
Why worry about all of these little things and getting everything just so? Because our footage will still be useable for many years, and still look and sound very good… and, as we know, Quality Shines… (and sorry for the techie stuff)